Coloring Air-Dry clay: 3 methods to try (Foam Clay & Resin Clay)
Share
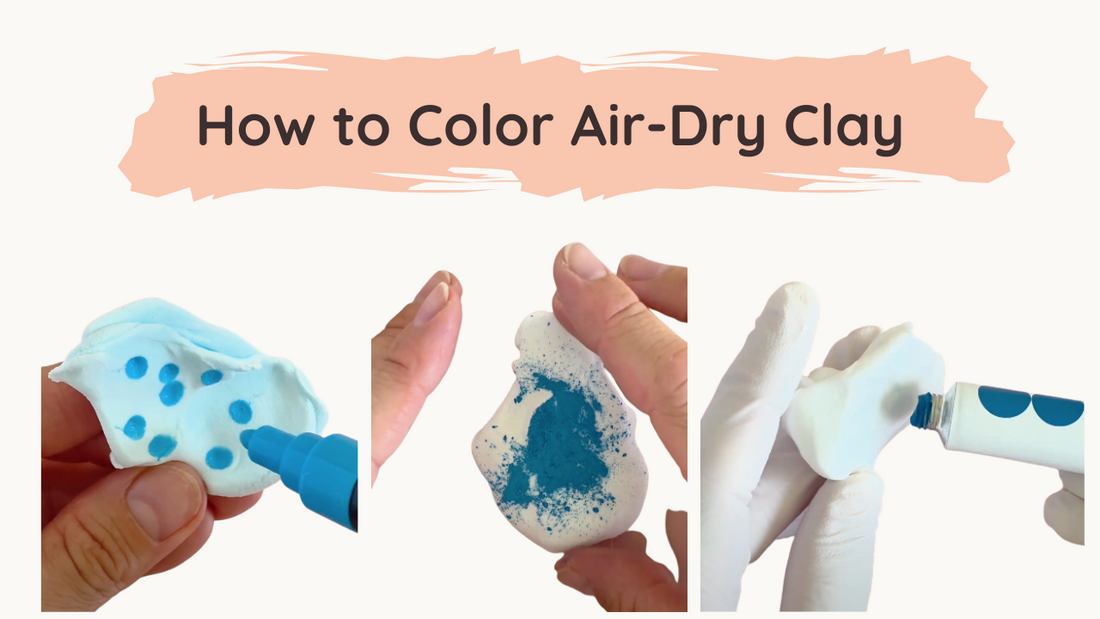
Air-Dry Clay is a versatile material for creative projects—from cute miniatures to realistic decorations. The right coloring plays a crucial role in bringing your creations to life. In this post, I'll show you three tried-and-tested methods for coloring foam clay and resin clay : with felt-tip pens, acrylic paints, and pastels.
🎥 Click here for the full video tutorial
Foam Clay and Resin Clay: Differences in Coloring
Before we get started, a quick overview of the two keys:
- Foam Clay
- Soft, fluffy texture, opaque
- Already contains white pigments
- Dries very opaque and opaque
- Resin Clay
- Dense, reminiscent of mochi dough
- Appears white, but dries transparent or translucent
- Darkens considerably during drying
These properties influence how the colors appear and how intense they ultimately appear.
Coloring Air-Dry Clay with felt-tip markers

Air-drying clay can be easily colored with water-based felt-tip pens .
- Advantages:
- Clean, controlled application
- Perfect for small quantities or pastel shades
- No great risk of staining your fingers
- Disadvantages:
- Very time-consuming for larger quantities
- Intense colors are hardly achievable because the white in the Foam Clay is heavily diluted
👉 Ideal for fine details or small pastel projects.
Acrylic paints for strong color results with Air-Dry Clay

Acrylic paints or acrylic gouache are the fastest and most powerful solution.
- Advantages:
- Provides rich, intense colors
- Particularly suitable for larger quantities of clay
- Colors appear bright and dense
- Disadvantages:
- Very messy – gloves strongly recommended
- Less precise for small details
👉 The best choice if you want to achieve strong color results or color large quantities of air-dry clay .
Pastels for soft pastel shades and effects

Working with pastels is an exciting alternative if you are looking for special effects.
- Procedure: Grate the chalk into powder using a knife or grater and knead it into the clay.
- Advantages:
- Creates soft pastel tones
- Can create interesting speckled effects (e.g. on Easter eggs or ceramic looks)
- Disadvantages:
- You need a lot of chalk to achieve strong colors
- Somewhat more complex and uneconomical
👉 A good technique for special projects that require pastel colors or a speckled look.
Practical tips for working with air-drying clay
- Only dye as much as you really need. This way, you won't waste any material.
- Store leftovers in an airtight container, preferably in a plastic bag and a damp paper towel.
- Keep the clay moist. If it gets too dry while kneading, simply dip your fingertips into the water.
Coloring resin clay correctly – what you need to consider
When using resin clay , keep in mind that the colors become several shades darker after drying. This makes color selection more challenging.
👉 Recommendation: When mixing, choose a lighter shade – after 24 hours the tone will automatically become stronger.
Conclusion: Which Air-Dry Clay method is right for your project?
All three methods are suitable for coloring Air-Dry Clay – the choice depends on your project:
- Felt-tip pens: For small amounts, pastels, details.
- Acrylic paints: For bold colors and larger quantities – the most universal solution.
- Pastels: For experiments, textures, and soft effects.
With a little practice, you can achieve any desired color effect – whether you are working with foam clay or resin clay.
