

Aura Clay®
Ultimate Creator Bundle - The Complete Clay Collection
Every Color, Every Texture - Your Complete Miniature Art Toolkit
100g / 3.5oz = approx. 2–3 small charms or 1 miniature scene · 200g / 7oz = best for ongoing projects or experimenting with colors
Verfügbarkeit für Abholungen konnte nicht geladen werden
Share

The clay that actually delivers hyper-realistic results.
Aura Clay® Resin Clay has a unique Japanese formula that creates a hard, semi-transparent porcelain-like finish when dry — impossible to achieve with standard air-dry clay.
Dense and shape-stable with an ultra-smooth texture. Rolls thin, holds fine detail, and doesn't stick to your hands — exactly what miniature artists need.
Mix in acrylic paint, chalk pastels, or markers while wet. Sand, paint, and seal after drying. Total creative control from start to finish.
Whether it's your first charm or your hundredth commission — Aura Clay® delivers consistent, professional results every single time.
See what others are making
You might also love
The secret ingredient for hyper-realistic clay creations!
Product Details
What's included in this bundle?
Free EU shipping included
Our most comprehensive bundle featuring 8 packages of premium Japanese air-dry clay across all our specialty varieties. Everything you need to create an entire miniature bakery or dessert collection.
What's Included:
- 2x Gourmet Clay - Vanilla (100g each)
- 2x Gourmet Clay - Chocolate (100g each)
- 2x Gourmet Clay - Marshmallow (100g each)
- 1x Air-Dry Resin Clay (200g)
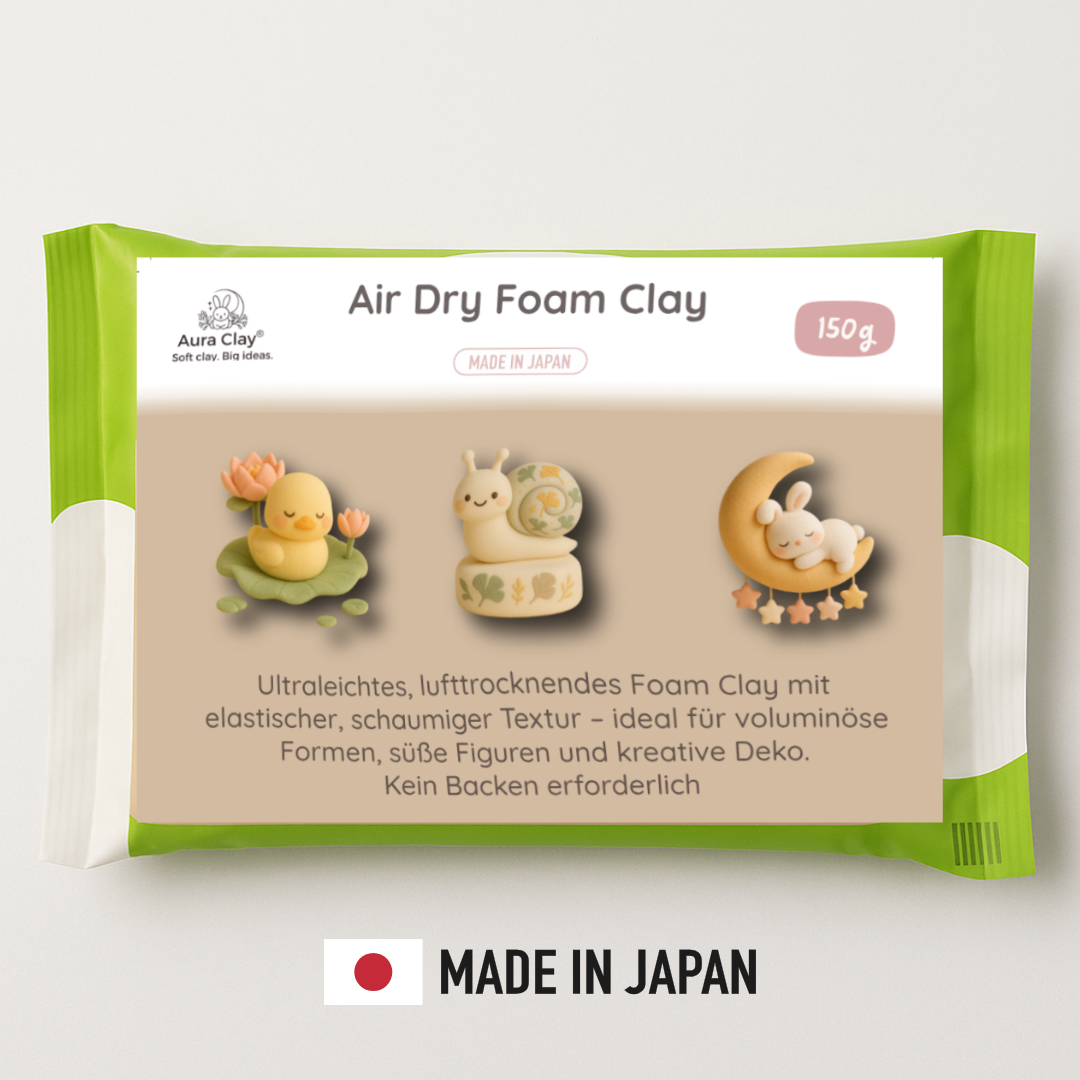
- 1x Air-Dry Foam Clay (150g)
Why choose this bundle?
The Ultimate Creator Bundle gives you the complete color palette and texture variety to create any miniature dessert you can imagine - from realistic pastries to kawaii treats, translucent glazes to fluffy textures.
Key Features:
- Complete range of gourmet colors (vanilla, chocolate, marshmallow)
- Multiple clay textures for different effects (resin, foam, gourmet)
- Air-dries naturally - no baking required
- Made in Japan with premium quality materials
- Perfect for serious miniature artists and collectors
- Best value - save compared to buying individually
Free EU shipping on orders over €50!
Switching from Polymer Clay? Read this first.
Resin Clay is a completely different material from polymer clay — and that's actually what makes it special. Here's what to expect so you can hit the ground running:
The key differences:
- No baking needed — Resin Clay air-dries naturally. No oven, no kiln, no burning smell.
- It starts drying as you work — unlike polymer clay, Resin Clay begins to firm up when exposed to air. Work with small amounts at a time and keep a small bowl of water nearby to re-moisten as needed.
- ~10% shrinkage is normal — your piece will shrink slightly as it dries. For miniatures, this is barely noticeable and actually gives pieces a more refined look.
- It's softer and more delicate when wet — treat it gently. Don't force shapes; let the clay guide you.
- Storage is crucial — always seal unused clay in its resealable pouch and then into an airtight container. A slightly damp paper towel in the container extends shelf life for months.
- The finish is different — Resin Clay dries to a hard, semi-transparent, porcelain-like surface that polymer clay simply cannot replicate. This is the whole point.
Pro tips for your first session:
- Start with a simple shape — a small charm or food slice. Don't attempt complex pieces on your first try.
- Keep your hands slightly moist — dry hands speed up surface drying. Use a spritz bottle or lightly damp fingertips.
- Give it 7 days before sealing or painting — the surface dries quickly but full curing takes time. Rushing this step can lead to cracks.
Getting Started — Your First Resin Clay Project
Ready to create your first piece? Here's everything you need to know to get started with confidence.
What you'll need:
- Aura Clay® Resin Clay (that's this!)
- A small bowl of water
- Acrylic paint or chalk pastels for coloring
- Basic clay tools (toothpick, sculpting needle, or a bamboo skewer work perfectly)
- A flat, smooth work surface
Your first session — step by step:
- Take a small amount of clay (about the size of a grape). Less is more for beginners.
- Knead it gently until it's smooth and pliable. If it feels slightly dry, add a tiny drop of water.
- To color: knead a tiny amount of acrylic paint directly into the clay before shaping.
- Shape your piece. Keep unused clay wrapped in cling film while you work.
- Place your finished piece on a flat surface to dry. Avoid direct sunlight or heat sources.
- Wait at least 24 hours before handling. Wait 7 days for full cure before sanding, painting, or sealing.
- Once fully dry, sand lightly if needed, paint details with acrylic, and seal with a clear varnish.
Need more inspiration? Check out our free tutorials on the blog — new projects every week.
Ideal for
- Miniatures and Food Art
- Jewelry and Accessories
- Kawaii Charms
- Sculptures and Art Objects
Texture & Sculpting Properties
- Dense and shape-stable
- Heavier than standard air-dry clays
- Excellent detail retention
- Rolls out smoothly — ideal for thin layers
- Dries hard with a porcelain-like finish
- Approx. 10% shrinkage during drying
- Can be colored while wet with acrylic paint, chalk pastels, or markers
- Once fully dry: can be sanded, painted, and sealed
Tips & Tricks
How to slow down drying while sculpting
Air-Dry Clay starts drying once you take it out of the sealed package. Humidity and warmth of the environment affect drying time significantly. To keep your clay pliable while sculpting, keep a small bowl of water nearby. Dip your fingertips in whenever the clay feels dry, or lightly spray larger pieces. You can always add more water — a little at a time. If you have dry hands, we also recommend applying hand cream before sculpting. This helps your clay stay flexible and stretchy while you work.
Is your clay drying out too fast?
If you're working on multiple pieces at the same time, store them between two sheets of moist (not wet!) paper towels. Place your piece on one moist paper towel and cover it with another. This 'sandwich method' preserves the elasticity of unfinished pieces while you work on another. When ready to assemble, just remove them from the paper towels.
Trouble attaching pieces to each other?
No problem! Simply add a tiny dab of transparent, fast-drying wood or craft glue to your pieces before sticking them together.
How to store
To keep your air-dry clay usable for as long as possible, always store it as airtight as you can. After use, place the Resin Clay back into the resealable pouch, close it securely, and then store it inside an airtight container.
Pro tip: Add a slightly damp paper towel to the airtight container. This keeps your Resin Clay fresh for many months without drying out. Make sure to replace the towel regularly and disinfect the container with alcohol to prevent germs.
How long does it take for Air-Dry Clay to dry?
Within the first few hours after modeling, you can safely touch your Resin Clay piece with care. However, to ensure your creation is fully cured all the way through, allow it to dry for 7 days.After that, your piece can be sanded, painted, or sealed without any issues.
Ingredients
Resin Clay: Water, preservatives, liquid paraffin, liquid plasticizer, powder
Chocolate Resin Clay: Resin-based hollow filler, stone powder, fungicide, antiviral agent, resin, water, pigment
Vanilla Resin Clay: Resin-based hollow filler, stone powder, fungicide, antiviral agent, water, pigment
Foam Clay: Resin-based hollow bodies, synthetic adhesive, preservatives and fungicide, water
Marshmallow Clay: Resin-based hollow filler, synthetic adhesive, preservatives and fungicide, water
Important Safety Details
Resin Clay is not a toy and not suitable for children under 3 years of age!
- Not intended for consumption.
- If accidentally swallowed, rinse the mouth thoroughly with water.
- Consult a doctor if the product has been swallowed.
- Avoid contact with eyes, nose, ears, or other sensitive areas of the body.
- Wash hands thoroughly with soap after use.
- Do not use if you have cuts, scratches, swelling, or skin irritation on your hands or arms.
- May cause allergic reactions such as itching or skin rashes in some individuals.
- Discontinue use immediately if any symptoms occur.